Are you looking for a butterfly craft to keep a pair of little hands busy? If so, this charming butterfly wand is perfect for children to create, make and play with. This craft is ideal for preschoolers and early primary school aged children, as a spring / summer activity when all the butterflies are fluttering about too!
We originally made this craft for our preschool’s Easter fundraiser and sold these as craft packs, with all proceeds going to the preschool. We found that the children absolutely loved making their butterfly wands! With a little guidance from an adult, it was easy for them to put together, and afterwards they played with their finished wands all day long.

This craft will be mainly comprised of sticking things together (no glue hurrah!) and an adult will need to make the butterfly felt and foam shapes beforehand. It’s a mess-free craft which is easy to prep and do!
*Please note adult help and supervision will be required for this craft at all times, during the making of this craft and playtime afterwards.*
Here are the materials and tools you will need to prep this butterfly wand craft:

Materials
- Foam sticker sheets (glitter or coloured)
- Felt sheets
- Stickers
- Pipe cleaners
- Lollipop sticks
- Ribbon selection
Tools
- Pencil
- Safety scissors
- Double sided sticky tape
For the butterfly shape you can download this template below or create your own if you’d like.
Instructions
Step 1. An adult will need to use the butterfly template, to cut out the butterfly shapes on the felt material and foam sticker sheets. This will ensure a consistent butterfly shape in preparation for this craft and you can make as many colour combinations as you’d like!
The below combinations were made for the preschool craft packs.

Step 2. Have your child pick a pipe cleaner and cut two pieces about 8cm long, ready for the butterfly antennae.
Step 3. To make the antennae, wrap the top ends of the pipe cleaners around a pencil or pen to get the antennae shape.

Step 4. Next, have your child choose their ribbons and cut them about 40cm long. You will want at least 6 pieces of ribbon.
You will now have all of the pieces ready to make your butterfly wand just like the below.

Step 5. With your child, peel off the sticker back off the foam sheet butterfly and stick on the antennae to the top mid-section. Stick on the lollipop stick to the bottom mid-section, like the picture below.

Step 6. Have your child stick the ribbons to the bottom of the butterfly about 2.5cm inwards and either side of the lollipop stick.

Step 7. Add strips of double sided tape to the back of the felt butterfly like the below picture. The top strip will stick to the antennae and the bottom two will stick to the ribbons.

Step 8. Peel off the sticky back tape covers on the felt butterfly. Carefully stick the felt butterfly to the sticky side of the foam butterfly. This will encase the antennae, lollipop stick and ribbons. You can push the felt to the edge as it’s a moldable material to cover any gaps.

Step 9. Have your child decorate their butterfly with stickers on the front, back or both.
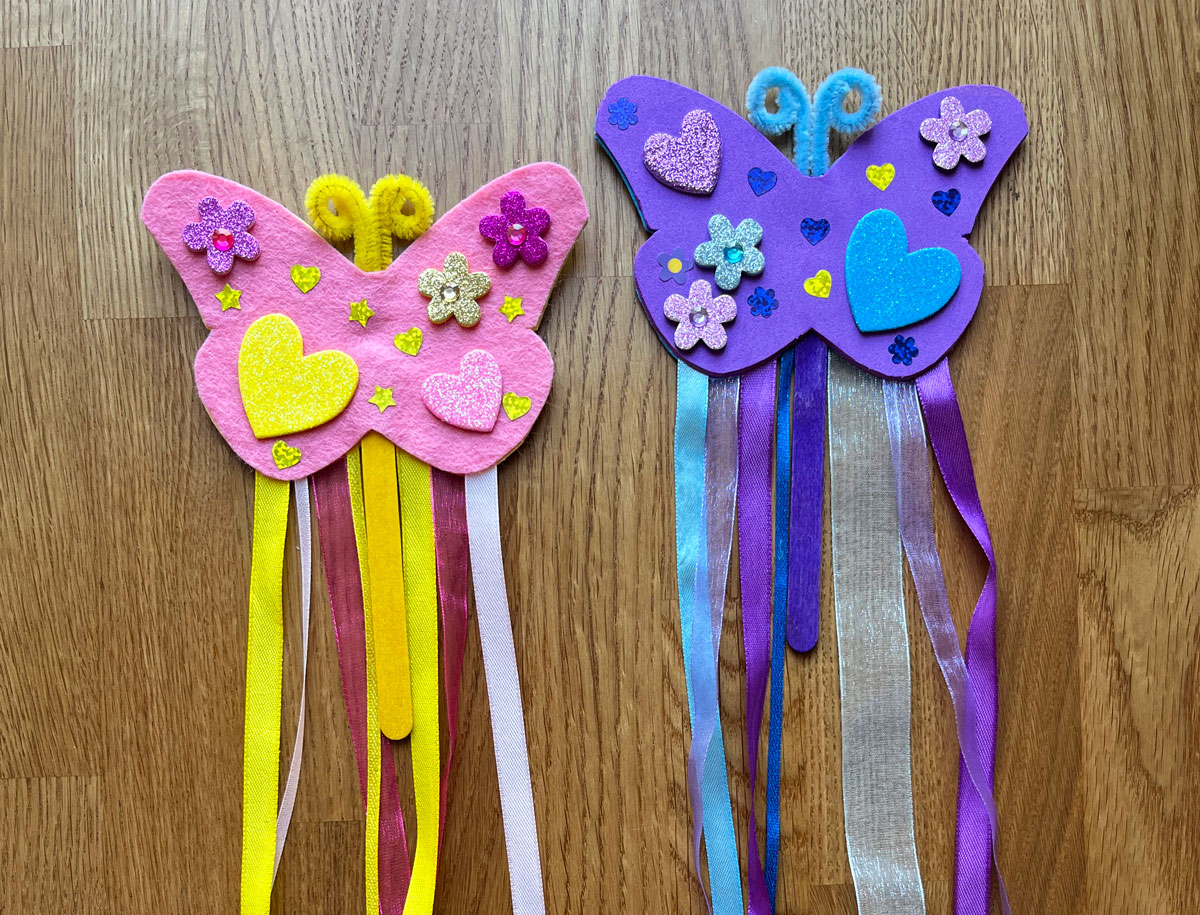
You will now have a lovely finished butterfly ribbon wand! Beautiful!

You could make these in various different colour combinations and experiment with different ribbon widths and materials. You could use strips of material instead of ribbon to get a more textured effect. Experiment and see what you come up with and do let me know how you get on.

Just in case you would like to see… here are the butterfly wands made into craft packs for the preschool Easter fundraiser. They all sold out and all the proceeds went to the preschool.

Feel free to share this post and let me know what you think in the comments, I would love to hear about your results.
Happy butterfly wand crafting!
Enjoy this tutorial? Enter your email below to receive the latest Craft with Mei posts straight to your inbox!

Leave a Reply